Add a new dataset and collection
The following instructions are for when adding an entirely new dataset to the platform which does not have a corresponding collection configuration.
If you’re adding a new dataset to an existing collection you can follow the same process, but ignore step 2.
1. Ensure the collection is noted in the dataset specification
Skipping this step won’t result in any specific errors but is strongly recommended to ensure that the list of collections in the specification is up to date.
Go to https://github.com/digital-land/specification/tree/main/content/dataset and check if there is a .md file for your new dataset
E.g., if you plan to add a dataset named article-4-direction you want to check that https://github.com/digital-land/specification/tree/main/content/dataset/article-4-direction.md exists. That’s all!
If it doesn’t exist, raise this issue with the Data Design team and they should be able to set it up.
2. Create Collection and Pipeline config in the config repo
The config repo contains collection and pipeline folders for each unique collection held within the pipeline. In this case, there won’t be one for the new collection.
You’ll need to create new folders ( collection and pipeline) and the required files within those folders for the collection that needs to be created. There is a really handy script for this step, simply run create_collection.py like so:
python create_collection.py [DATASET NAME] E.g., python create_collection.py article-4-direction
Check that this has created the following files and that only the headers are in them:
- collection
- endpoint.csv
- source.csv
- old-resource.csv
- pipeline
- column.csv
- combine.csv
- concat.csv
- convert.csv
- default-value.csv
- default.csv
- expect.csv
- filter.csv
- lookup.csv
- old-entity.csv
- patch.csv
- skip.csv
- transform.csv
3. Update Specification & Provision Rule
Once you are ready to add the data, make the following changes in the update the collection name for the dataset in the specification repository.
- Navigate to specification -> content -> dataset, locate the .md file corresponding to the dataset being added, and insert the relevant collection name. This step ensures that the DAG for this collection is created in Airflow.
- Navigate to the provision-rule.csv and create a rule for the new dataset and any organisations that may provide this data. If you are unsure on what fields to add to the provision-rule, please speak with the Data Manager.
4. Add endpoint(s) for the new dataset (optionally mapping and default values)
In case a column-field mapping was provided, you’ll need to add the mapping to column.csv. Make sure to map to the correct data, we want to map some column to its equivalent field e.g the dataset might have a different name for the reference so we need to map this to our reference field.
In case there is a defaultValue given for a field in the schema, we want to add this to the default-value.csv.
Follow steps 3 and 4 in ‘Adding an Endpoint’ for instructions on adding mapping and default values.
Next, you can just proceed to add an endpoint via the add-data tool or Manage Service.
Note: If the dataset being added is a spatial dataset (i.e., it contains geometry), a column mapping must be included to map WKT to geometry. Without this mapping, the dataset will not have any geometry.
5. Check in Airflow
When the collection is added to the specification, this should automatically create a new DAG in all Airflow environments. Firstly, check the collection has been created and looks correct.
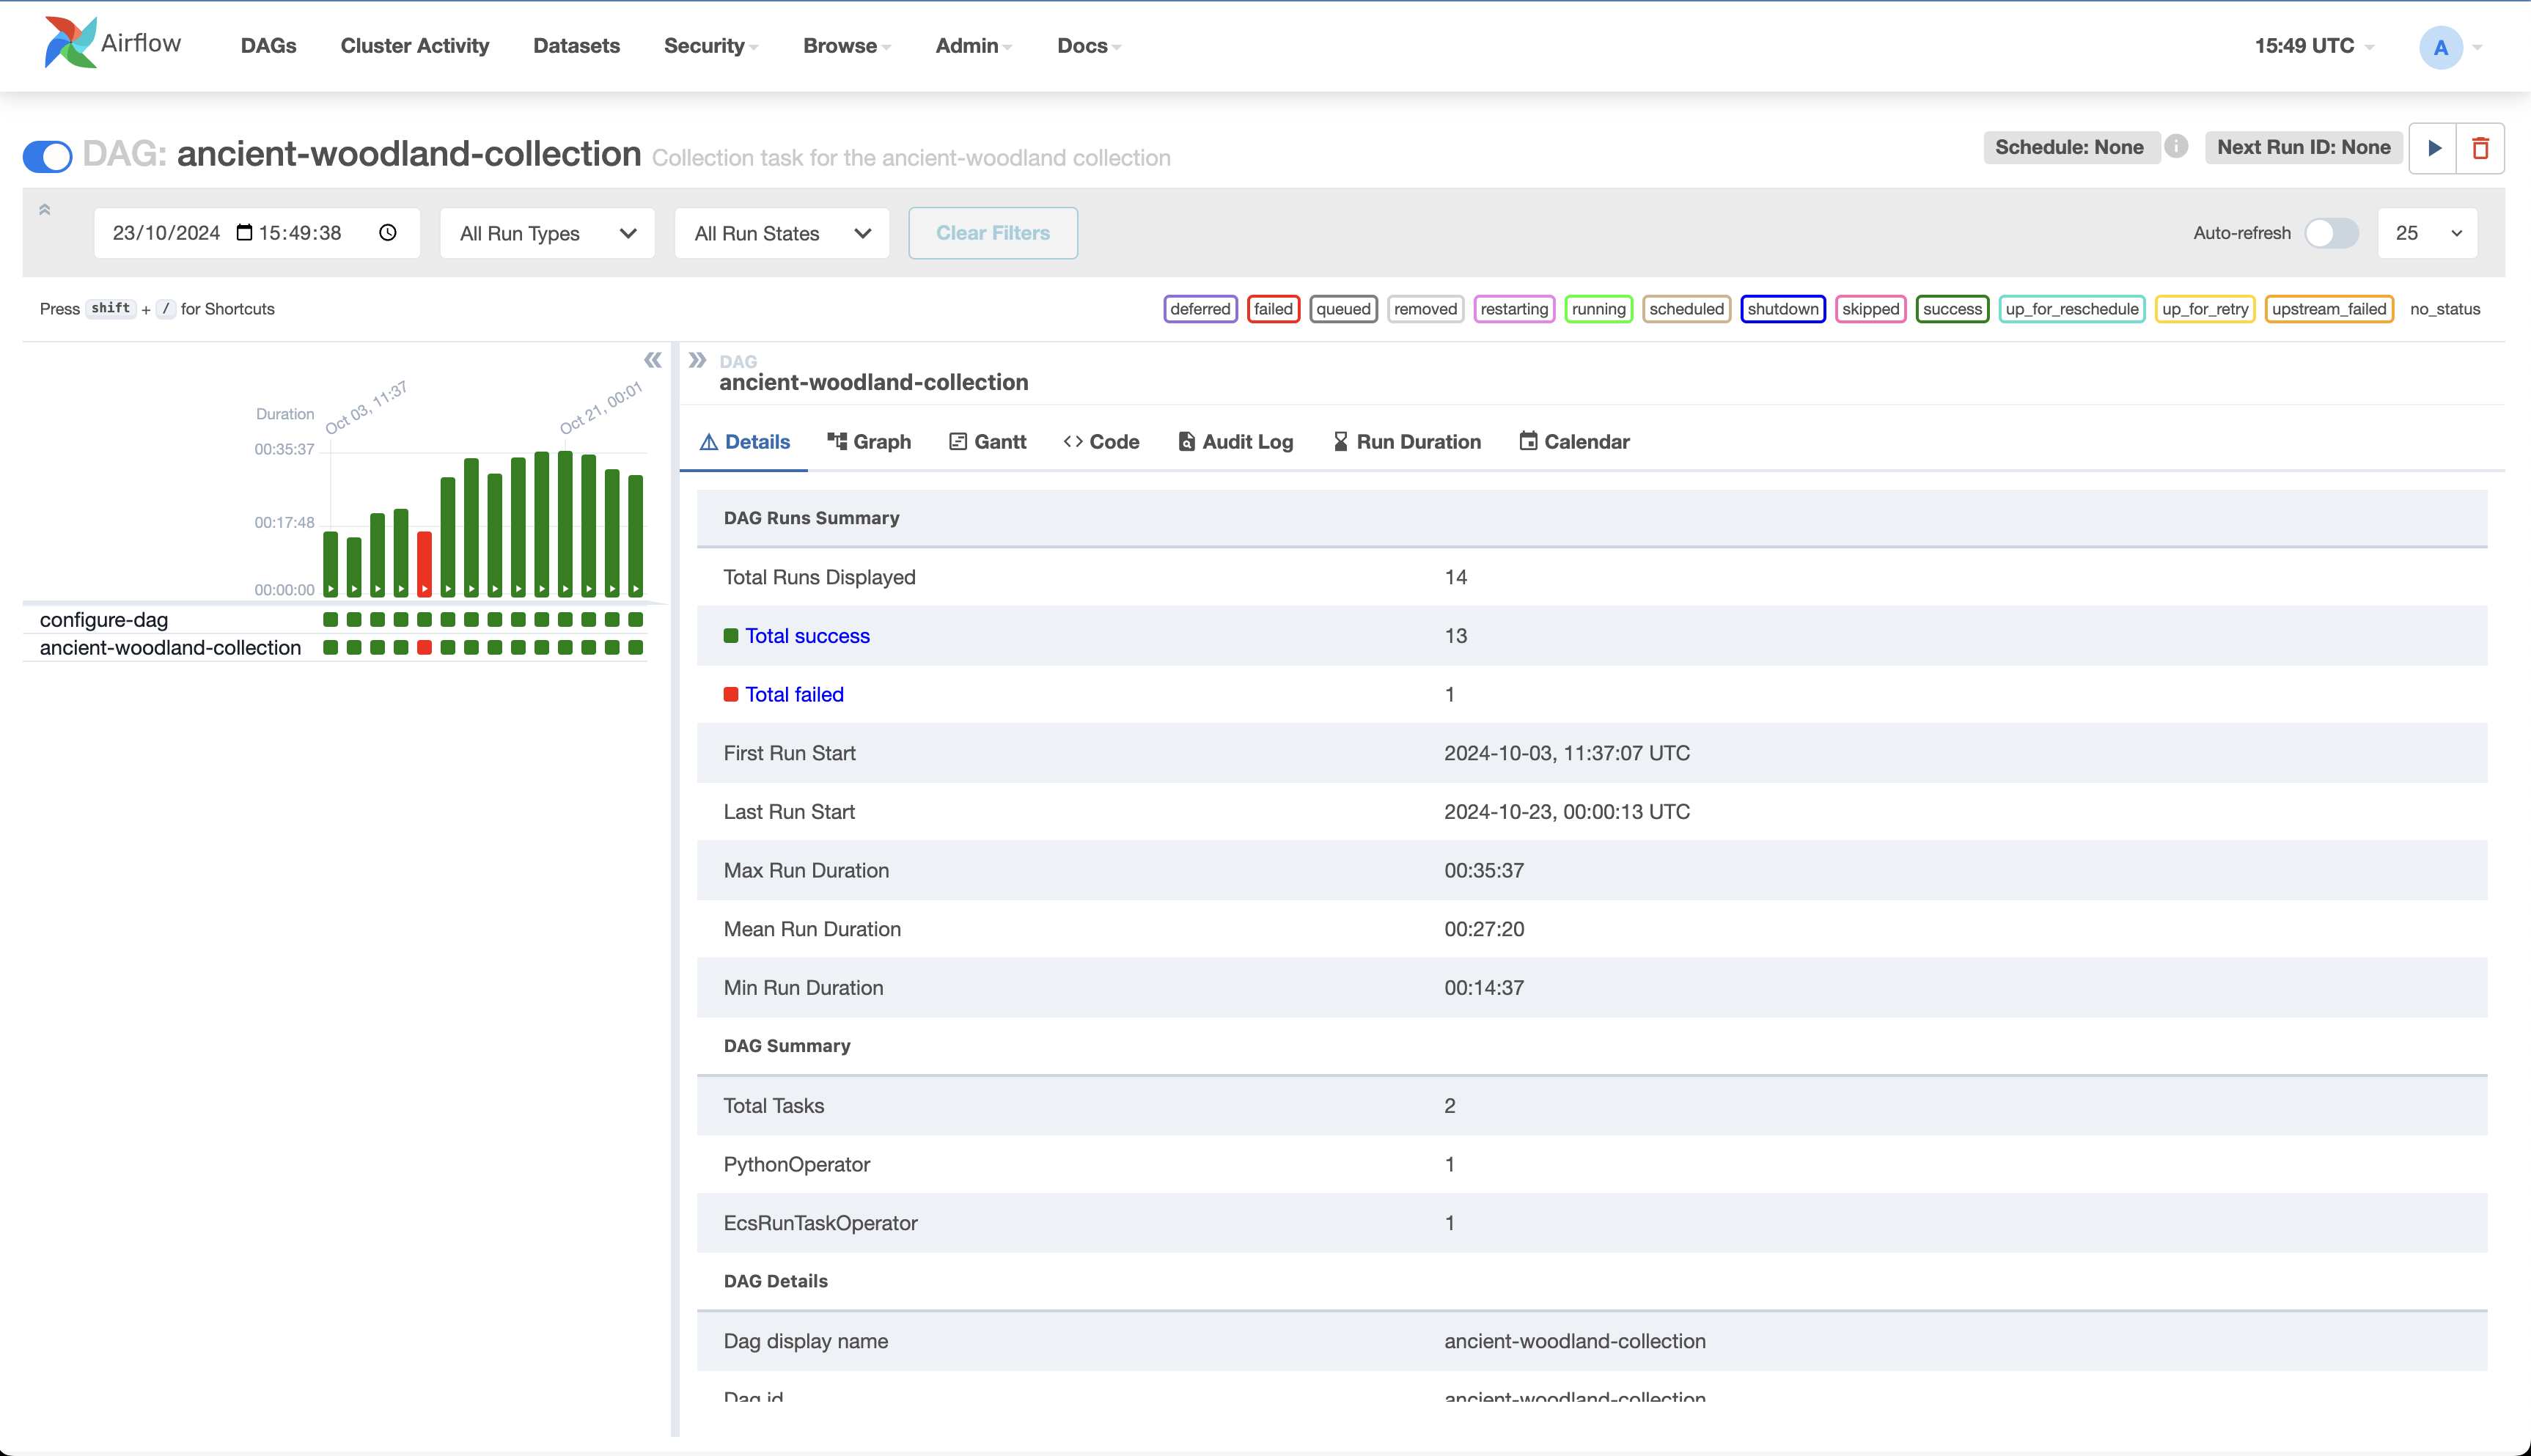
Verify new collection present
If the collection is present, you should be able to execute it and view details of the last execution, e.g.
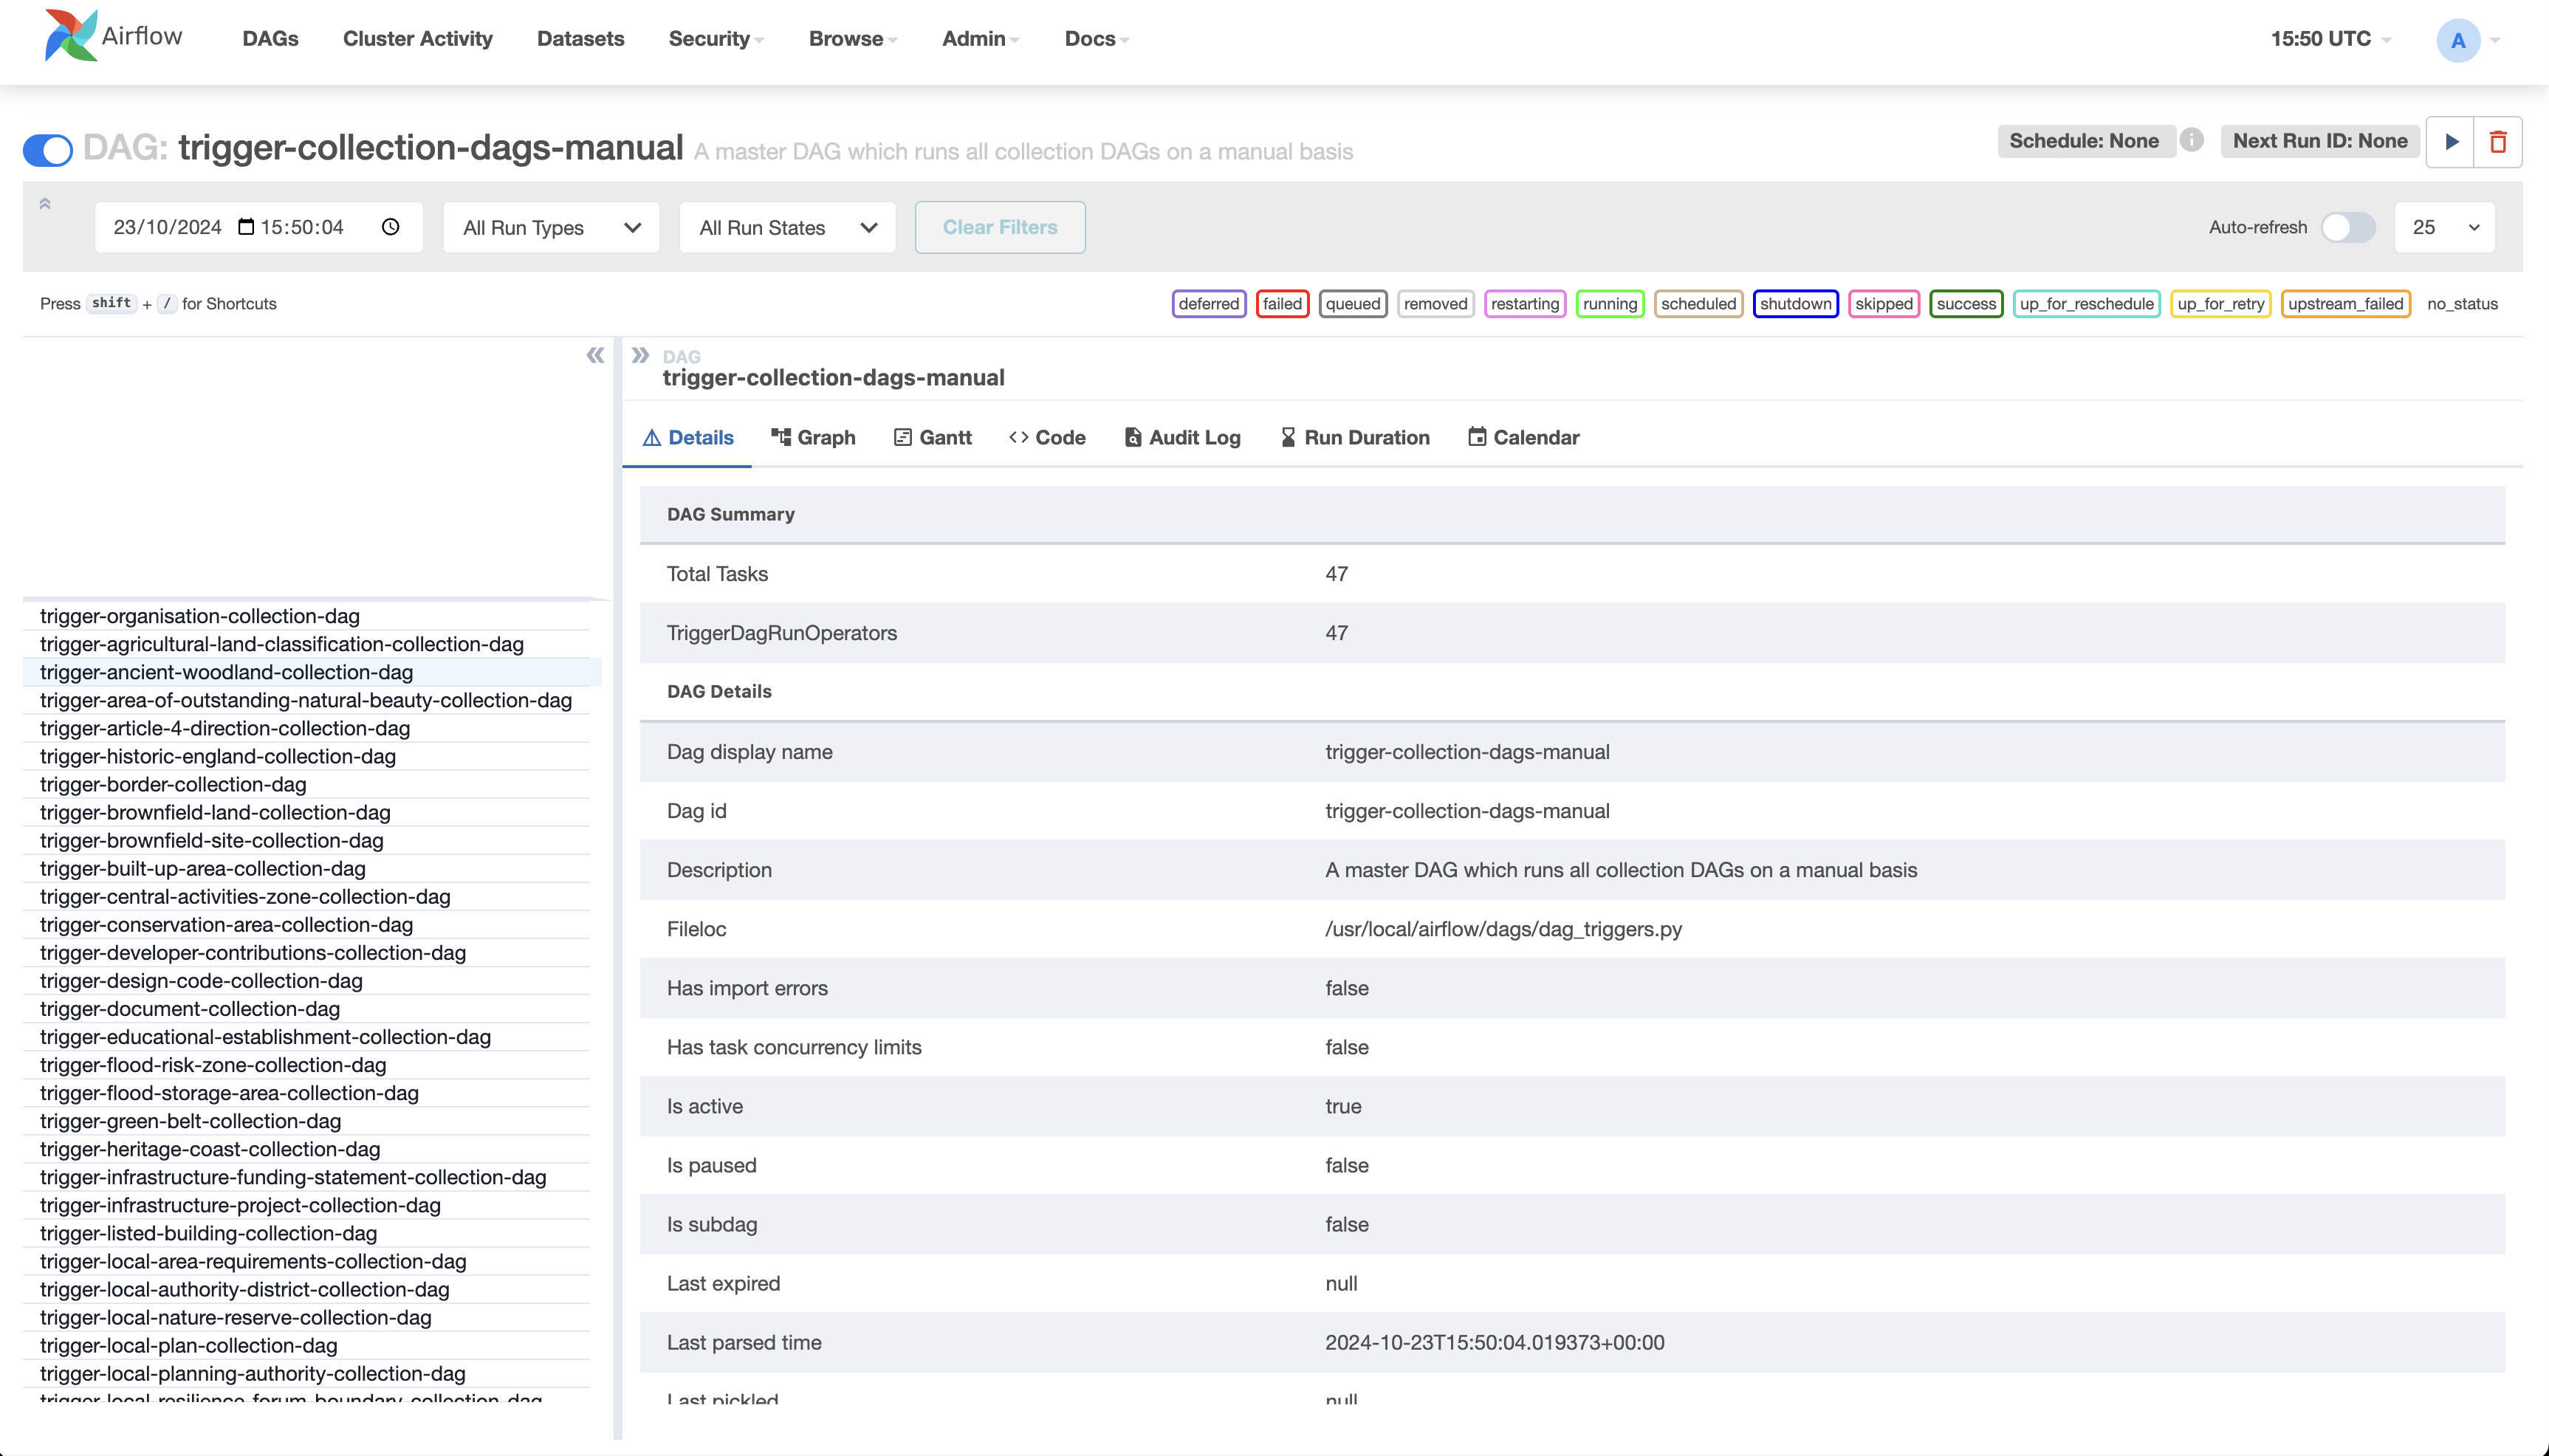
You should be able to verify that the collection is included in the trigger-collection-dags-manual DAG, e.g.
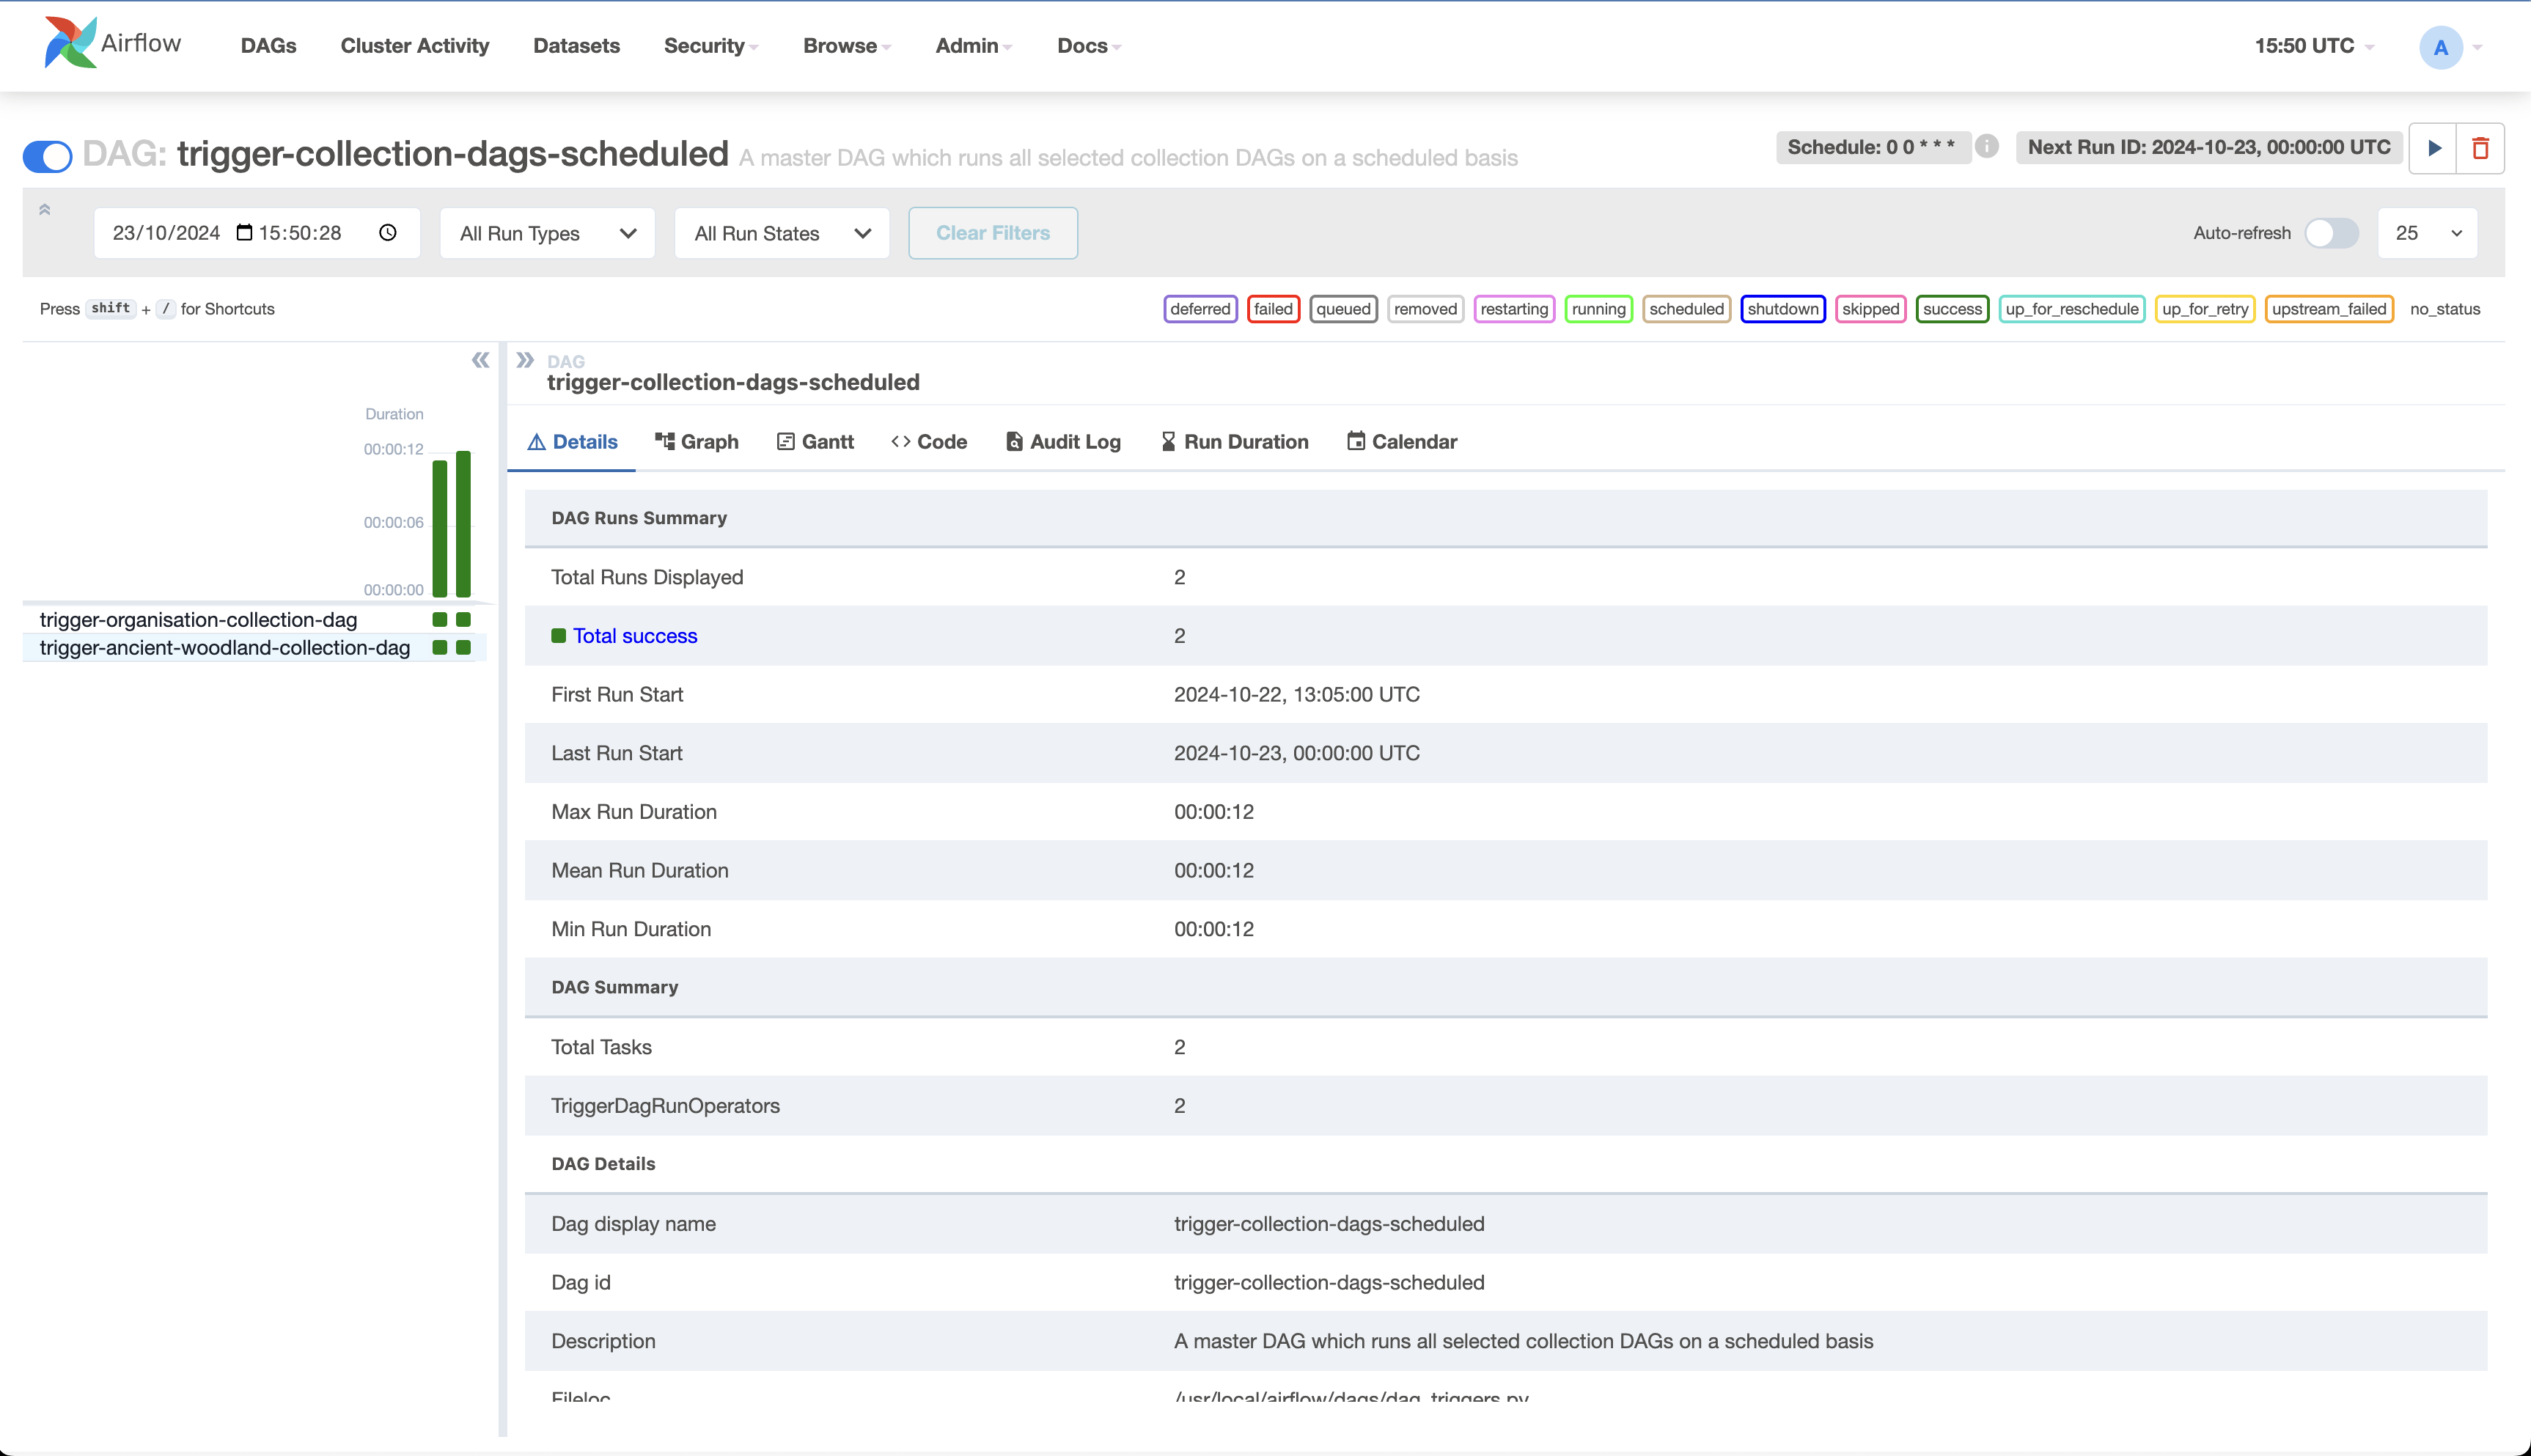
If the collection is selected for schedule, then it should also be present within the trigger-collection-dags-scheduled DAG, e.g.
First, execute the collection in the Airflow development environment to identify any potential issues early. This helps prevent failures when deploying to production.
If the run was successful, there will be a green box next to the newly run workflow. If it was unsuccessful, check the logs to find out what the issue was or reach out to the infrastructure team for assistance.
Next, execute the collection in the Airflow staging environment. If the run is successful, share the Planning Data staging URL with Data Design team for review.
The collection will execute in production during the overnight run. If you don’t want the collection to run in production for any reason, disable the DAG for it in the Airflow production environment.
Re-publish DAGs
-
It’s highly unlikely, but if you have any DAG configuration changes to make within the airflow-dags repo, raise your changes as a pull request. Seek approval and have it merged.
-
When you’re ready to publish DAGs to AWS, run the GitHub Action to publish DAGs. After the GitHub Action has run, you’ll be able to verify the collection is present via the Airflow UI.
Tip: If, despite all this, the collection does not appear on datasette, try running the workflow again, or wait until the next cycle of digital-land-builder has run.